Friday, September 2, 2011

FRAMED WEDDING VOWS AND INITIALS

I am guessing that every married couple (my husband and I included) displays their best wedding picture in their homes and chances are, a wedding album is lying around somewhere in the living room. Well, it is indeed nice to have a remembrance of the day  when you vowed to love each other before God.

Whenever I reminisce my wedding day, I lovingly remember the part when we said our personal vows to each other. Because of this, I thought of preserving our vows in a frame where I can always read and recall the promises we made.

Believe me, you will find it really helpful in days when you don't find your partner very lovable. (I'm pretty sure every married couple knows that there are really days like that.) And when the husband is being naughty, I just tell him to face the wall and read his vows over and over until it sinks in. (Good idea huh?) But seriously, my husband did appreciate this project when I hanged it on our bedroom wall.

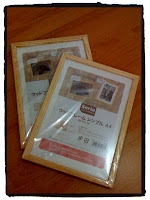
It is really as simple as it looks like. You will need the following:


You can be as creative as you want and add something sentimental like a wacky picture from the photo booth (if you had one during your wedding) or pressed flower from the bridal bouquet (if you saved it), the wedding invitation or maybe make hand prints ... there is really no limit. As for me, I decided to add our initials.

Friday, August 26, 2011

MULTIPURPOSE MEMO BOARD

 
 My finished project =D

The cork board part where I can pin my inspirations and visions.

 The magnetic board part where I post notes, reminders and bills.

The weekly planner part where I plot my important appointments, events and deadlines.


Sunday, August 21, 2011

RED WALL OF FAME


I've always wanted a red wall. One particular small piece of wall in my marital home - all RED. Not too bloody that it may overwhelm the mood of our humble abode with rage but just enough to make a fierce accent.

I seldom get the time to do a big (this is already big in my realm) project like this and so last Sembreak (October 2010), I took advantage of the most welcomed 7-day vacation to put together my "Red Wall of Fame".


On my drawing board: I used an app in my iphone to sketch this so I can have a visual of what is in my mind.


DAY 1: The ever reliable newspaper and masking tape are truly the best tools in making sure that there will be no slip ups.


DAY 2: I tried using brush and rollers in painting. For me, the rollers proved to be the faster and easier way to paint the wall evenly.
DAY 3: I had the photos printed in black and white after I have meticulously chosen the shots that will make it up on the wall. I bought all white frames to soften the intensity of the red background.

DAY 4: If you are an avid viewer of HGTV, this is one of the common tips given by interior decorators. Using any available paper (manila paper, newspaper, used calendar) I cut out the exact size of the different frames I want to put up and then taped it on the wall in the lay out that satisfied me.

DAY 5: I used nail glue (available in any hardware store and even at National Bookstore) in mounting the frames on my newly repainted (and already DRY of course!) RED wall. Using drills would be too much hard labor for me plus I'm certain that I'd just messed up my wall with holes I wouldn't know how to cover up.


DAY 6: I hanged a black and white printed curtain to complete the look I want to achieve.


Here are the BEFORE and AFTER shots:

DAY 7: Marvel at the fruits of my labor.


The whole ensemble matches the overall design of our living room. 

I know the living room is still pretty plain and needs to be accessorized (ex. LCD TV, throw pillows, etc.). I'm still planning to hang big wall mirrors to make the space look bigger and put a small black coffee table in the middle. In time, it will be dealt with...one project at at time.

CrazyBluePixie

Some days I wake up with these crazy ideas in my mind...rushing, running, passing through like a train chugging along faster and faster, louder and louder. (I guess that's why they say "train of thoughts") I so want to instantly get working on 'em one at a time or even simultaneously while I still have 'em in my thoughts, in my system. But as always, the routines of my life (wife duties, work duties, responsibilities, deadlines, bills, relations and this never ending list of things that realistically just need to be prioritized) get in the way.

Some days I wake up and it"s all just "BLAH!"...that's when I decide to just go back to sleep and hopefully return to neverland where anything creative and fancy and even ridiculous are possible.

Today I woke up and the chugging sound in my head is telling me to collate all my crazy (okay, not so crazy), not so impulsive and not so absurd thoughts in one outlet.

Hence, the creation of this blog "CrazyBluePixie" (which I am pretty sure I will not be able to update as often as I want).

In here, I will be posting the different projects I've done; I'm doing and will be doing primarily just to express my artistry, style and taste. I want to be inspired and probably also be able to inspire. But I do not claim to be an expert or "in the know" of whatever I will be sharing. Most of the time I don't know what I'm doing. Other times, I just get ideas from the net and recreate them in my own style.

But once in a blue moon, I also come up with my very own unique piece of art or craft or project and that's when "the crazy and the blue and the pixie" all collide.